

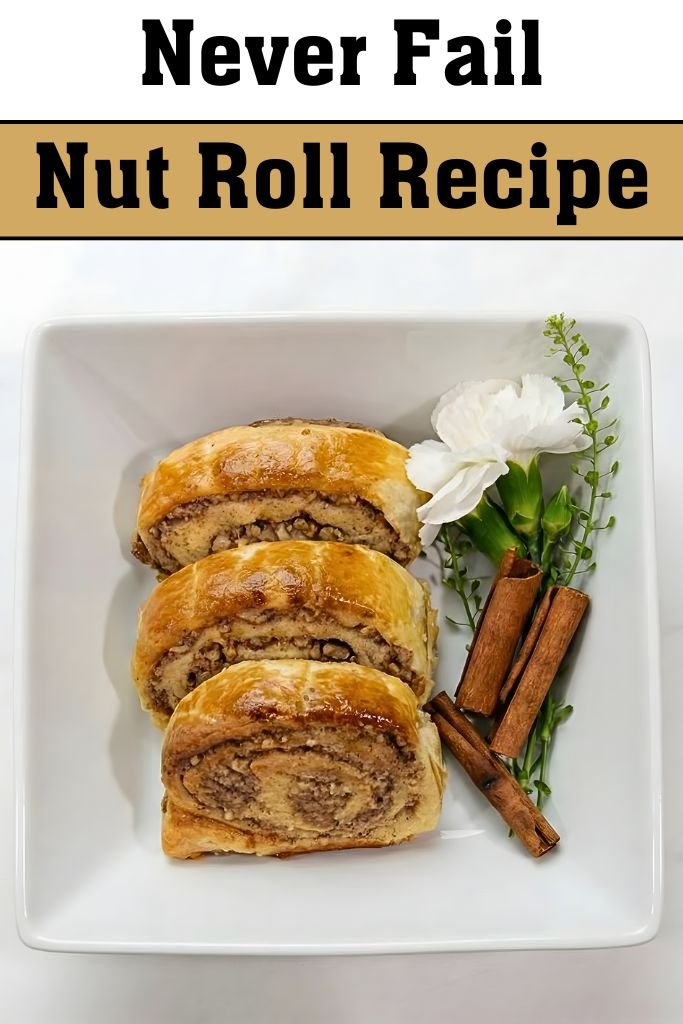
Never Fail Nut Roll Recipe
A nut roll is a soft bread filled with sweet nuts and spice. Many home bakers love it, yet many also feel nervous about baking one.
I felt the same way for years. Nut rolls can seem hard, even for skilled bakers. The dough may crack.
The filling may leak. Some rolls turn dry fast. Most of these problems come from small steps that are easy to fix. People love it because it feels warm, filling, and homemade.
This Never Fail Nut Roll came from learning what really causes trouble. The dough stays soft. The filling holds together. The steps stay simple and clear. Nothing feels rushed or confusing.
By following this simple recipe, the perfect homemade Never Fail Nut Roll Recipe comes together right at home with calm, steady steps and trusted results every time.
What Is a Never Fail Nut Roll
A Never Fail Nut Roll is a trusty homemade pastry that works every single time. The name comes from its soft, easy dough that’s simple to handle.
Beginners and expert bakers both have great success with this method.
Long ago, people from Central Europe brought this recipe to America. Families made these rolls for holidays and special days.
Churches held baking sales with nut rolls and raised money for their communities. This recipe became a tradition passed down through generations.
The “never fail” part means you get reliable results no matter what. The dough doesn’t crack easily or tear apart.
The filling stays inside where it should be. This method is different because it focuses on a softer dough that’s easier to work with than traditional recipes.
Types of Nut Rolls by Region
- Eastern European Nut Roll Overview: These rolls are the original style from countries like Slovakia, Hungary, and Poland. The dough is yeast-based and soft. Families make them for Christmas and Easter celebrations. They’re treasured in many homes today.
- Slovak Nut Roll: Slovak versions use a walnut filling with plenty of sugar and spices. The dough is thin and flaky, rolled very thin before adding the filling. These rolls are less sweet than American versions.
- Hungarian Nut Roll (Bejgli): Hungarian bejgli has a richer filling with more sugar and spices. Some versions include cocoa powder or chocolate. The dough is rolled thin, creating many flaky layers and a delicate texture.
- Polish Nut Roll: Polish nut rolls use walnuts mixed with breadcrumbs or cake crumbs. The filling is moist and full of flavor. These rolls are often larger and heartier and are popular in Polish bakeries.
- American Bakery-Style Nut Roll: American bakery-style nut rolls are sweeter than European versions. The dough is slightly thicker and chewier. Bakers often add raisins or dried fruit to the filling to match American taste preferences.
Never Fail Nut Roll Ingredients
For the Dough:
- 2¼ teaspoons (7 grams) active dry yeast – This makes the dough rise and become light. If you don’t have active dry yeast, you can use instant yeast in the same amount.
- ½ cup (120 milliliters) warm water – Warm water helps the yeast wake up and work. The water should feel warm but not hot to your finger. Too-hot water kills the yeast. Cold water won’t activate it properly.
- 2¾ cups (330 grams) all-purpose flour – This forms the base of your dough. Bread flour also works as a substitute if you have it on hand.
- ¼ cup (50 grams) granulated sugar – Sugar feeds the yeast and adds slight sweetness. You can swap this with brown sugar, though the flavor will change a bit.
- ½ teaspoon (3 grams) salt – Salt brings out all the flavors in your dough. Don’t skip this ingredient.
- 1 large egg – Eggs add richness and help bind ingredients together. This makes the dough soft and tender.
- ¼ cup (60 milliliters) whole milk – Milk creates a soft, fluffy texture. You can use any milk type: whole, low-fat, or non-dairy milk alternatives.
- 3 tablespoons (45 grams) Crisco Shortening, melted – Shortening keeps dough soft and tender. You can replace it with the same amount of coconut oil or butter.
- 2 tablespoons (30 milliliters) olive oil – This helps keep the dough moist and smooth. You can use any neutral cooking oil instead.
For the Filling:
- 2 cups (240 grams) walnuts, ground fine – Ground walnuts are the main filling. Make sure they’re fresh for the best taste. You can use the same amount of pecans or a mix of nuts instead.
- ½ cup (100 grams) granulated sugar – This sweetens the filling and works with the walnuts. Brown sugar works as a substitute for a deeper flavor.
- ¼ cup (60 grams) melted butter – Melted butter keeps the filling moist and rich. You can use melted coconut oil or melted shortening as replacements.
- ¼ teaspoon (0.5 grams) ground cloves – Cloves add warm, spicy flavor to the filling. This amount is important, so don’t skip it.
- 1 teaspoon (2 grams) ground cinnamon – Cinnamon brings sweetness and warmth to the filling. Ground allspice works as a substitute.
Equipment Needed for Nut Rolls
- Mixing bowls – Dough and filling
- Measuring cups – Accuracy
- Measuring spoons – Spice balance
- Blender or processor – Grind nuts
- Rolling pin – Shape dough
- Baking sheet – Even baking
- Parchment paper – Easy cleanup
How to Make Never Fail Nut Roll
Step 1 | Activate Your Yeast
Pour the warm water into a small bowl. Add the yeast and stir gently. Let it sit for about five minutes. You’ll see it foam up when it’s ready. This shows the yeast is alive and working.
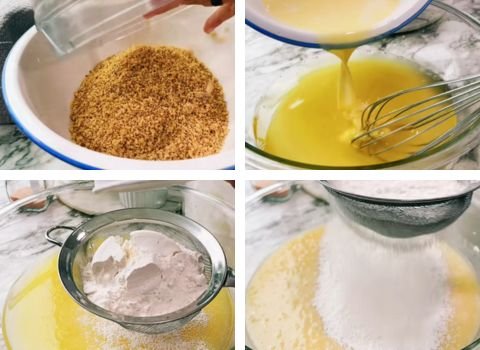
Step 2 | Combine Your Base Dough Ingredients
In your large mixing bowl, combine the flour, sugar, and salt. Mix these dry ingredients well.
In another bowl, beat the egg and mix it with milk. Pour this egg mixture into the flour. Add the melted shortening and olive oil. Stir everything together until you have a shaggy dough.
Step 3 | Add the Yeast Mixture
Pour your foamy yeast mixture into the dough. Mix everything together using your wooden spoon.
Keep mixing until all the flour is wet and blended in. The dough will look rough and sticky at this point.
Step 4 | Knead Your Dough
Turn your dough onto a clean counter. Knead it with your hands for about ten minutes. Push it down with the heel of your hand, fold it back, and repeat.
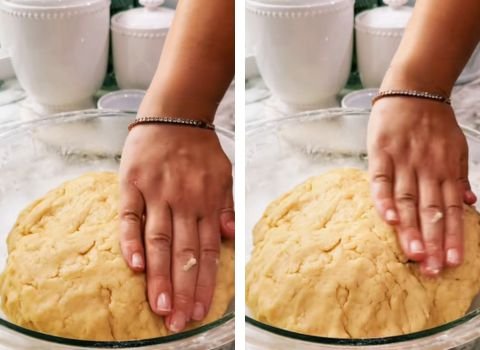
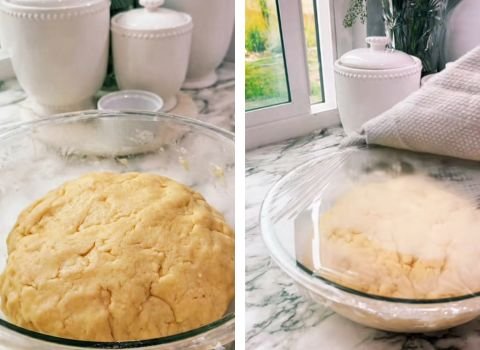
Step 5 | Let Your Dough Rise
Continue until the dough feels smooth and slightly elastic. It should spring back a little when you poke it.
Place your dough in a clean bowl. Cover it with a damp kitchen towel. Put it in a warm, quiet spot away from drafts. Let it rise for about one hour, or until it roughly doubles in size.
Step 6 | Prepare Your Walnut Filling
While the dough rises, grind your walnuts until fine.
In a separate bowl, mix the sugar with melted butter. Stir in the ground walnuts, cloves, and cinnamon. Mix well until the filling looks moist and uniform. Set aside.

Step 7 | Shape Your Dough
Once the dough has risen, turn it out onto your counter. Divide it in half using a knife. Work with one half at a time.
Roll the dough into a rectangle using a rolling pin. It should be about a quarter-inch thick.
Step 8 | Spread Your Filling
Brush the rolled dough lightly with melted butter. Spread half of the walnut filling evenly over the dough, starting from the edge closest to you and working toward the far edge.
Step 9 | Roll Up Your Dough
Starting from the edge closest to you, roll the dough tightly toward the far edge. Keep the roll firm. Press the end edge into the dough to seal it.

Step 10 | Cut and Place on Baking Sheet
Using a sharp knife, cut the roll into pieces about two inches wide.
Place each piece on a parchment-lined baking sheet, leaving space between them. Repeat with the second half of the dough.

Step 11 | Final Rise
Cover the baking sheet with a damp towel. Let the rolls rise for about thirty minutes until slightly puffy and soft.
Step 12 | Bake Your Rolls
Preheat your oven to 375°F. Bake the rolls for twenty to twenty-five minutes, until the tops are golden brown and the bottoms are lightly browned.
Step 13 | Cool Your Rolls & Serve
Remove the rolls from the oven and let them cool on the baking sheet for a few minutes.
Transfer the homemade Never Fail Nut Roll Recipe to a cooling rack and allow them to cool completely before serving or storing.

Expert Tips for Avoiding Common Nut Roll Problems
- Prevent Dough Cracking: Cracking means dough is dry or unrested; keep covered while resting, pause rolling when resisting, rest briefly until stretches smoothly.
- Control Filling Moisture: Nut filling should be moist, not wet; rest five minutes after mixing so butter and sugar distribute evenly.
- Avoid Filling Leaks: Leaks occur when overfilled or poorly sealed; leave clean borders, spread evenly, avoid pressing, use thin dough.
- Keep Rolls Soft, Not Dry: Overbaking dries rolls; verify oven temperature, remove when golden, avoid baking darker than necessary for softness.
- Ensure Even Baking: Rotate trays halfway for even browning; tent with foil if browning fast, lower oven temperature slightly if needed.
- Check Doneness Properly: Press tops gently to feel springy firmness; tap bottoms for hollow sound, indicating fully baked without over drying.
Serving, Sharing, and Gifting Nut Rolls
These rolls look beautiful on any table. Arrange them on a pretty plate or cake stand. The golden-brown color and swirl pattern make them look good without effort.
- Serving at Home: Slice the rolls and serve them slightly warm with coffee or tea. Using a nice plate or tray gives them a bakery-style look right at home.
- Gift Wrapping and Transport: Let the rolls cool completely before wrapping them tightly in plastic wrap or placing them in an airtight container.
- Gifting to Friends and Family: Homemade nut rolls make a thoughtful and meaningful gift. They show care and effort that store-bought treats can’t match. Add a handwritten note or share the recipe if someone asks to make the gift feel even more personal.
- Church and Community Events: Nut rolls are perfect for bake sales, potlucks, and community gatherings. They look impressive on the table but still feel comforting and familiar.
- Holiday and Special Occasions: Nut rolls fit right into holiday traditions and special celebrations. They’re great for Christmas, Easter, or any family gathering.
Make-Ahead, Storage & Freezing
Make-Ahead: You can prepare the filling 2 days ahead and keep it chilled. The dough can rise overnight in the fridge; let it warm up a bit before rolling.
Freezing: Nut rolls freeze very well. Wrap the cooled rolls (whole or in portions) tightly in plastic wrap and then in foil. Freeze for up to 3 months. Thaw at room temperature.
Room Temperature Storage: Keep sliced or whole nut rolls in an airtight container at room temperature for up to 5 days.
Never Fail Nut Roll Recipe FAQs
1. Why does nut roll filling leak?
Leaks happen when filling holds too much moisture or spreads too close to edges. Butter and sugar must balance the nuts. Leaving a clear border helps.
Rolling with steady pressure keeps the seam tight. Fine grinding also helps the filling stay put during baking.
2. Why do nut rolls crack or split?
Cracks come from dry dough or tight rolling. Proper kneading builds stretch. Resting the dough relaxes gluten. Rolling gently and baking at steady heat keeps the crust flexible and smooth.
3. Why do nut rolls turn dry?
Dry results follow overbaking or low fat. Measuring flour carefully matters. Butter, oil, and milk add moisture. Pull the loaf once golden and cool under a towel.
4. How can dough problems be fixed?
Sticky dough needs a light dust of flour. Stiff dough needs a splash of warm milk. Gentle kneading brings balance without toughness.
5. What yeast works best?
Active dry yeast gives steady rise and clear timing. Instant yeast also works with equal amounts. Warm liquids help yeast wake and work well.
6. How fine should nuts be ground?
Nuts should look like sand, not paste. Large bits cause tearing. Powder-like grind can turn gummy. A few short pulses in a processor work well.
7. Can oil replace shortening?
Oil adds moisture yet changes texture. Shortening keeps crumb tender. A blend of oil and butter offers balance and flavor.
8. Why does the roll bake unevenly?
Uneven heat or pan crowding causes patchy color. Center rack placement and space between loaves fix this issue.
9. Can spices be adjusted?
Cinnamon and cloves can shift slightly. Small changes keep balance. Too much clove can overpower the nut flavor.
10. My dough is too sticky to handle. What should I do?
Don’t panic! While kneading, add more flour one tablespoon at a time until the dough just pulls away from the sides of the bowl or your hands.
It should still feel a little tacky but not stick to everything. A slightly sticky dough often bakes up softer.
Never Fail Nut Roll Recipe

Never Fail Nut Roll Recipe with soft bread and sweet walnut filling. A comforting, homemade favorite for holidays and special gatherings.
Ingredients
Dough Ingredients
- 2¼ teaspoons active dry yeast (7 grams)
- ½ cup warm water
- 2¾ cups all-purpose flour (330 grams)
- ¼ cup granulated sugar (50 grams)
- ½ teaspoon salt (3 grams)
- 1 large egg
- ¼ cup whole milk
- 3 tablespoons Crisco shortening, melted (45 grams)
- 2 tablespoons olive oil
Nut Filling Ingredients
- 2 cups finely ground walnuts (240 grams)
- ½ cup granulated sugar (100 grams)
- ¼ cup melted butter (60 grams)
- ¼ teaspoon ground cloves (0.5 grams)
- 1 teaspoon ground cinnamon (2 grams)
Instructions
- Pour the warm water into a small bowl. Add the yeast and stir gently. Let it sit for about five minutes. You'll see it foam up when it's ready. This shows the yeast is alive and working.
- In your large mixing bowl, combine the flour, sugar, and salt. Mix these dry ingredients well. In another bowl, beat the egg and mix it with milk. Pour this egg mixture into the flour. Add the melted shortening and olive oil. Stir everything together until you have a shaggy dough.
- Pour your foamy yeast mixture into the dough. Mix everything together using your wooden spoon. Keep mixing until all the flour is wet and blended in. The dough will look rough and sticky at this point.
- Turn your dough onto a clean counter. Knead it with your hands for about ten minutes. Push it down with the heel of your hand, fold it back, and repeat. Continue until the dough feels smooth and slightly elastic. It should spring back a little when you poke it.
- Place your dough in a clean bowl. Cover it with a damp kitchen towel. Put it in a warm, quiet spot away from drafts. Let it rise for about one hour, or until it roughly doubles in size.
- While the dough rises, grind your walnuts until fine. In a separate bowl, mix the sugar with melted butter. Stir in the ground walnuts, cloves, and cinnamon. Mix well until the filling looks moist and uniform. Set aside.
- Once the dough has risen, turn it out onto your counter. Divide it in half using a knife. Work with one half at a time. Roll the dough into a rectangle using a rolling pin. It should be about a quarter-inch thick.
- Brush the rolled dough lightly with melted butter. Spread half of the walnut filling evenly over the dough, starting from the edge closest to you and working toward the far edge.
- Starting from the edge closest to you, roll the dough tightly toward the far edge. Keep the roll firm. Press the end edge into the dough to seal it.
- Using a sharp knife, cut the roll into pieces about two inches wide. Place each piece on a parchment-lined baking sheet, leaving space between them. Repeat with the second half of the dough.
- Cover the baking sheet with a damp towel. Let the rolls rise for about thirty minutes until slightly puffy and soft.
- Preheat your oven to 375°F. Bake the rolls for twenty to twenty-five minutes, until the tops are golden brown and the bottoms are lightly browned.
- Remove the rolls from the oven and let them cool on the baking sheet for a few minutes. Transfer to a cooling rack and allow them to cool completely before serving or storing.
Nutrition Information:
Serving Size: (Per 1 Slice)Amount Per Serving: Calories: 215Total Fat: 12gSaturated Fat: 4gTrans Fat: 12gCholesterol: 25mgSodium: 95mgCarbohydrates: 24gFiber: 2gSugar: 9gProtein: 4g
This Never Fail Nut Roll Recipe gives you a soft, sweet result every time. The clear steps help you avoid old troubles.
I hope you try it and share your own beautiful nut rolls with the people close to you.