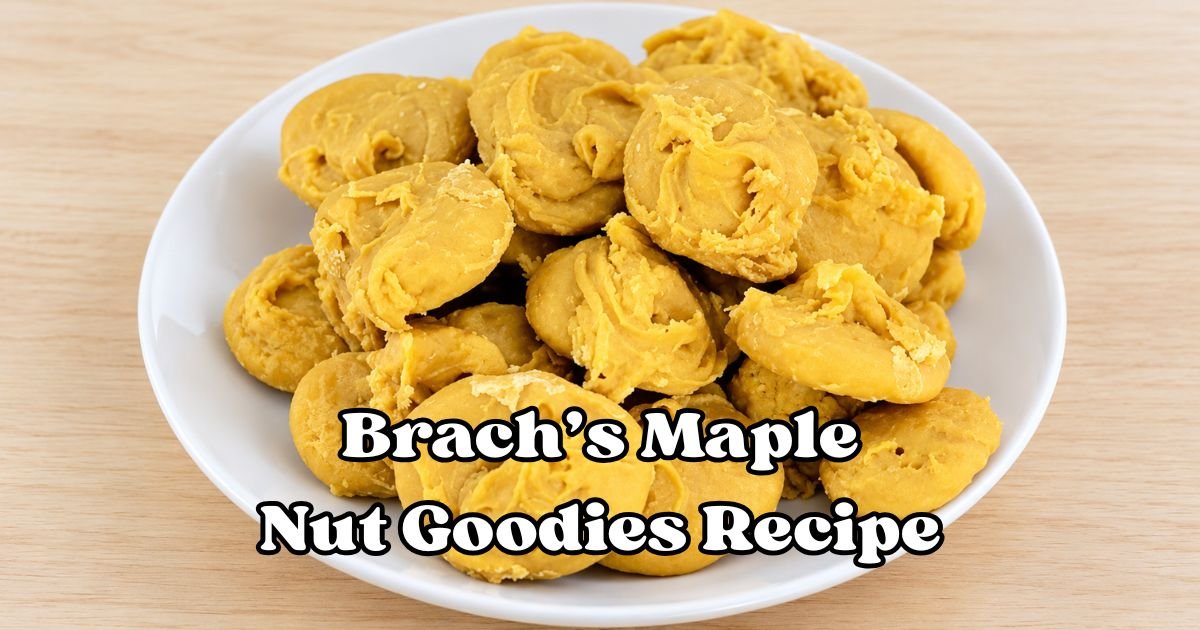
Brach’s Maple Nut Goodies Recipe

Christmas candy bowls remind me of childhood. They were full of chocolates, peppermints, caramels, and other sweet treats.
Among those old-fashioned candies, Brach’s Maple Nut Goodies had a special place. Their sweet maple taste and crunchy peanuts made each piece different from the usual candy.
Brach’s Maple Nut Goodies may be harder to find now, so a homemade version is a handy choice. I like the idea of having that familiar maple flavor without searching store after store for a bag.
This copycat recipe combines a sweet candy coating and roasted nuts in one simple treat.
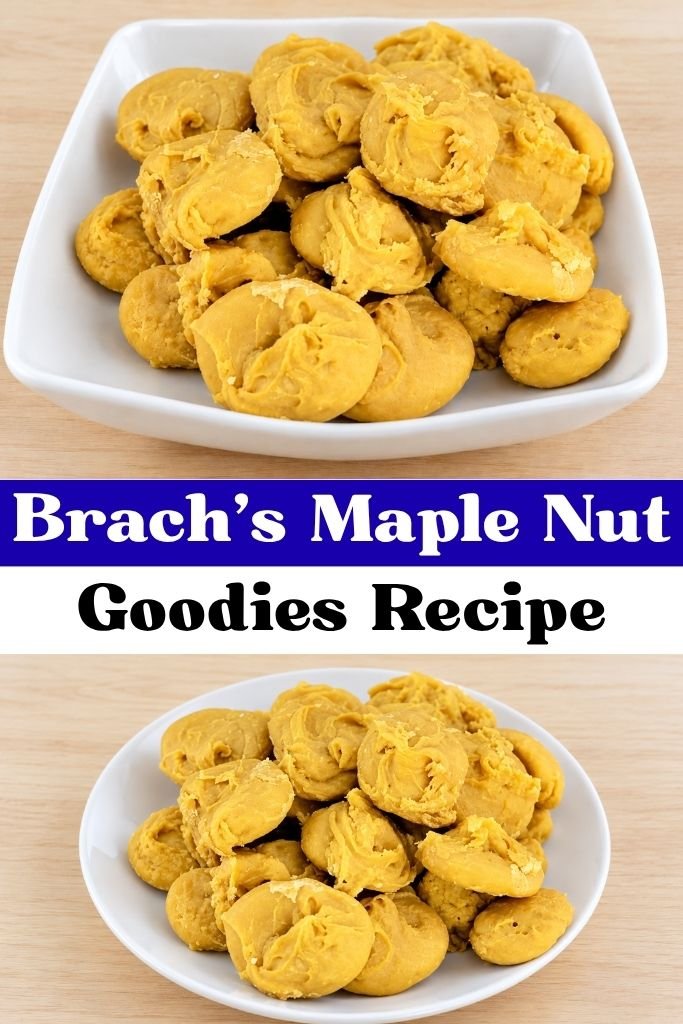
Are Brach’s Maple Nut Goodies Still Sold
Brach’s Maple Nut Goodies were first sold in 1912. They became a well-known American candy, with peanuts covered in a sweet maple-flavored coating. Some people remember a soft center, while others recall a crunchy, toffee-like bite.
Sadly, Brach’s Maple Nut Goodies have been discontinued. According to Tasting Table’s report, Brach’s confirmed on Facebook in February 2024 that the candy was no longer being made.
I could not find a direct link to that original announcement, so I would avoid presenting the report as a direct official statement. You may still find older bags through third-party sellers, but check the date and condition before buying.
Some similar candies are still available, but they have a different taste or texture.
Brach’s Maple Nut Goodies Recipe Ingredients
Candy recipes depend on the right balance of sugar, syrup, fat, and nuts. Gather everything before you start cooking.
1. Maple Syrup — 1 Cup – Pure maple syrup adds the main maple flavor. It also brings a deep, woodsy sweetness that plain white sugar cannot provide on its own. Grade A dark maple syrup works well when you want a stronger maple taste. Pancake syrup can contain corn syrup and flavoring instead, so the result may taste different.
Substitution: You can use another grade of pure maple syrup. Maple flavoring is not a full replacement for the syrup because it does not provide the same liquid or sugar content.
2. Granulated Sugar — 1 Cup – White sugar helps the candy reach the hard-crack stage. At that temperature, the cooked sugar sets firm as it cools. It also keeps the maple syrup from being the only source of sweetness. Measure it carefully, since changing the amount can affect how the candy sets.
Substitution: I do not suggest swapping in brown sugar for this recipe. Brown sugar contains more moisture and can change the texture. For a first batch, plain granulated sugar is the safer choice.
3. Light Corn Syrup — 1 Cup – Light corn syrup helps limit sugar crystals, which can leave candy grainy instead of smooth. It also helps the cooked mixture spread around the nuts. Its mild flavor lets the maple syrup come through without adding a strong taste of its own.
Substitution: Golden syrup may work, though the flavor and texture can change. Honey can brown faster and has a stronger taste. For the most reliable result, use light corn syrup as listed.
4. Unsalted Butter — ½ Cup – Butter adds a smooth, buttery flavor and helps balance the hard sugar coating. Unsalted butter gives you more control over the salt level, especially when the peanuts already contain salt. Cut it into small pieces before cooking so it melts more quickly when added.
Substitution: Salted butter can be used, but the finished candy may taste saltier. Reduce or skip any added salt in that case. Margarine is not my first choice because its water content can affect the candy.
5. Baking Soda — 1 Teaspoon – Baking soda reacts with the hot sugar mixture and creates bubbles. Those bubbles can give the candy a lighter, less solid texture. The mixture will foam quickly, so use a large saucepan and stir with care. Do not lean over the pan while adding it.
Substitution: There is no direct swap that gives the same effect. Baking powder is not the same and may not work as expected. Measure the baking soda level with a proper teaspoon.
6. Pure Vanilla Extract — 1 Teaspoon – Vanilla adds a soft, sweet smell and rounds out the maple flavor. It should support the maple, not cover it. Pure vanilla extract is a good choice, but standard vanilla extract also works well. Add it near the end of cooking so its flavor stays clear.
Substitution: Vanilla flavoring can be used in the same amount. Maple extract can add a stronger maple note, but use it carefully because some brands have a sharp taste. Do not add extra liquid to the hot candy.
7. Roasted Peanuts — 2 Cups – Roasted peanuts give the candy its nutty crunch. Their toasted flavor works well with maple syrup and cooked sugar. Unsalted peanuts let you control the salt level, while lightly salted peanuts add a sweet-and-salty taste. Use nuts that are fresh and crisp, not soft or stale.
Substitution: Pecans or almonds can replace the peanuts. Chop large nuts into bite-size pieces so they mix into the candy more evenly. Keep in mind that peanuts and tree nuts are common allergens, so check with anyone who will be eating the candy.
Kitchen Equipment You Will Need
- Large, heavy saucepan
- Candy thermometer
- Heat-safe spatula or wooden spoon
- Baking sheet or shallow pan
- Measuring cups and spoons
- Heat-safe gloves or oven mitts
How to Make Brach’s Maple Nut Goodies
1. Prepare the Pan and Ingredients
Line a baking sheet or shallow pan with parchment paper. Measure 1 cup maple syrup, 1 cup granulated sugar, 1 cup light corn syrup, ½ cup unsalted butter, 1 teaspoon baking soda, 1 teaspoon vanilla extract, and 2 cups roasted peanuts. Cut the butter into small pieces and keep all the ingredients ready before you start cooking.
2. Combine the Syrups and Sugar
Add 1 cup maple syrup, 1 cup granulated sugar, and 1 cup light corn syrup to a large, heavy saucepan.
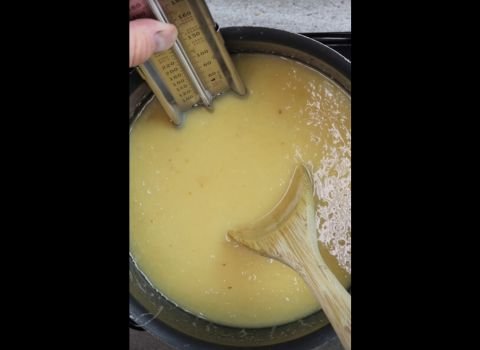
Heat over medium heat, stirring until the sugar dissolves. Once the mixture starts to boil, stop stirring and attach a candy thermometer to the pan.

3. Cook the Syrup to 300°F
Let the syrup boil without stirring until it reaches 300°F (149°C), the hard-crack stage. Watch the thermometer closely as the temperature rises. Remove the pan from the heat as soon as the syrup reaches 300°F.
4. Add the Butter, Baking Soda, and Vanilla
Carefully stir in ½ cup unsalted butter until it melts. Add 1 teaspoon baking soda and 1 teaspoon vanilla extract, stirring carefully as the mixture bubbles and foams. Keep your face and hands away from the hot mixture.
The syrup reaches its target temperature before these ingredients are added. Do not automatically return the pan to the heat or cook the mixture back to 300°F without confirming that the recipe requires it.
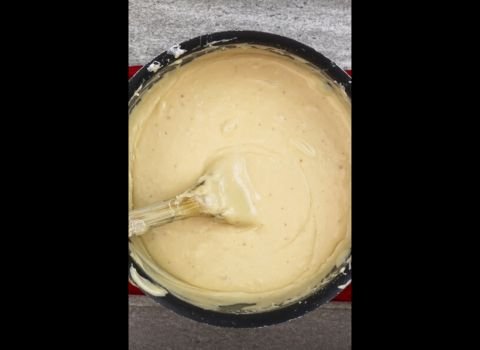
5. Stir in the Peanuts
Add 2 cups roasted peanuts to the hot mixture. Stir until the peanuts are evenly coated. Work quickly because the candy will begin to thicken as it cools.
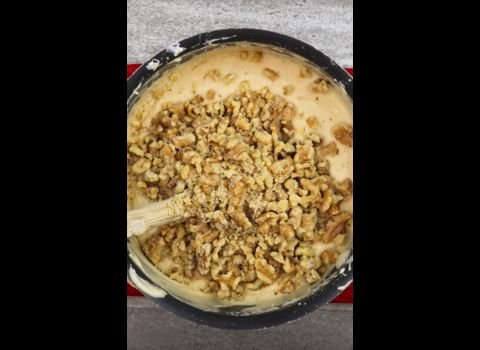
6. Spread the Candy
Pour the mixture onto the prepared baking sheet. Use a heat-safe spatula to spread it into an even layer. Avoid touching the hot candy with your hands.
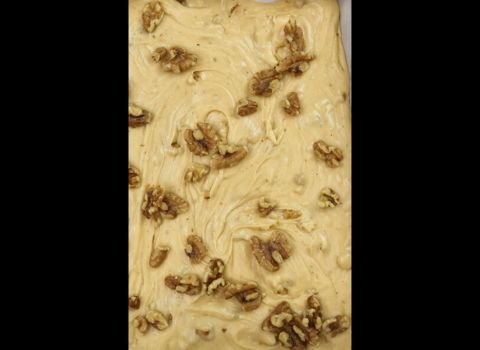
7. Cool and Break Into Pieces
Let the candy cool at room temperature until completely firm, about 1 hour. Once it has set, break it into bite-size pieces and transfer them to an airtight container.
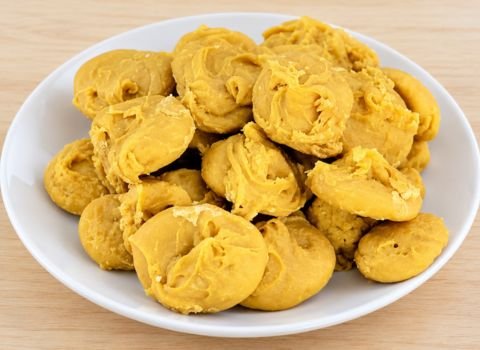
Tips From My Kitchen for the Best Brach’s Maple Nut Goodies
Candy is less forgiving than cookies, so I keep a few small habits close. These are the details that are easy to miss while the sugar cooks.
- Check your thermometer first: Drop it in boiling water before you start. It should read close to 212°F at sea level, but a higher altitude changes that number.
- Use fresh nuts: Old peanuts taste stale, and that ruins the maple flavor. A quick taste before you cook saves the batch.
- Leave burnt bits alone: If a dark layer forms on the bottom, don’t scrape it into the candy. It turns the taste bitter. Steady heat and a close eye on the temperature prevent it.
- Use a heavy pan: It heats evenly and cuts down on hot spots that burn the syrup.
How to Serve and Package Maple Nut Goodies
Maple nut candy works well on a holiday candy tray, but there is no need to save it for December. I like the idea of serving small pieces with coffee or tea, since the maple sweetness pairs well with a drink that is not too sweet.
Break the cooled candy into bite-size pieces and place them in a small bowl. You can also add a few pieces to a dessert plate with cookies, chocolate squares, or other homemade sweets. Keep the portions small because this candy is very sweet.
For gifts, place the pieces in small food-safe bags or candy boxes. Add parchment between layers to help prevent pieces from sticking together.
Tie each bag with ribbon and add a label that lists the ingredients, especially the peanuts. Store the packages in a cool, dry place until you are ready to share them.
Avoid leaving the candy in direct sunlight or near a warm oven. Heat can soften the coating, and moisture can make the surface sticky. For the neatest gift bags, pack the candy only after it has cooled completely.
Common Maple Nut Goodies Problems and How to Fix Them
Sugar candy can be tricky, but most problems come from temperature or moisture. Here are a few simple ways to fix them.
1. The Candy Is Too Soft – The syrup may not have reached 300°F. A low temperature leaves more moisture in the mixture, so the candy may bend or feel sticky after cooling. Use a candy thermometer and wait for the correct reading before removing the pan from the heat.
2. The Candy Tastes Burnt – The heat may have been too high, or the syrup may have cooked past the target temperature. Use medium heat and watch the thermometer closely near the end. Once the mixture reaches 300°F, remove it from the burner right away.
3. Candy Looks Grainy – Sugar crystals may have formed during cooking. Make sure the sugar dissolves before the mixture reaches a full boil, and avoid stirring once it starts boiling. Light corn syrup also helps reduce unwanted crystals.
4. The Mixture Foams Over – The saucepan may be too small. Baking soda causes the hot mixture to foam, so use a large pan with plenty of space above the liquid. Add the baking soda carefully and keep your face and hands away from the rising foam.
5. Nuts Clump Together – The candy may have started to cool before you spread it. Have the nuts measured and the lined pan ready before you cook the syrup. Stir just until the nuts are coated, then pour the mixture into the pan at once.
Storing Leftover Maple Nut Goodies
Store the candy in an airtight container at room temperature in a cool, dry cupboard. Place parchment paper between layers to keep the pieces from sticking together. Keep the container away from sunlight, the stove, and other warm spots.
For the best texture, use the candy within about 2 weeks. This is a practical home-storage suggestion, not a guaranteed shelf life. Check for changes in smell, appearance, or texture before eating any stored candy.
You can freeze hard candy, but I do not recommend it for this recipe. Freezing and thawing can lead to moisture on the surface, which may leave the candy sticky. A dry, airtight container at room temperature is usually the better choice.
Brach’s Maple Nut Goodies Recipe FAQs
These are the questions I hear most from friends who try candy making for the first time.
1. Can I add toppings or a finishing touch?
Yes, but add them fast. Sprinkle flaky sea salt over the candy right after you pour it, while the surface is still warm and tacky. The salt sticks and balances the sweetness nicely.
You can also drizzle melted chocolate over the cooled pieces, though that moves the taste away from the original maple flavor.
2. How do I keep Maple Nut Goodies from sticking together?
Make sure the candy is completely cool before storing it. Place the pieces in an airtight container and keep them in a dry area away from humidity. You can separate layers with parchment paper to prevent pieces from rubbing together.
Avoid storing the candy in the refrigerator, where condensation may form when it is brought back to room temperature.
3. Can I make Maple Nut Goodies ahead of time?
Yes, you can prepare this candy ahead of time for holiday treats, dessert trays, or homemade gifts. Let the candy cool completely, then break it into pieces and store it in an airtight container in a cool, dry place.
Keep it away from heat and moisture, which can make the candy sticky. For the best texture, avoid leaving the container open for long periods.
4. Can I use real maple syrup for Maple Nut Goodies?
Yes, real maple syrup works well in this recipe. It gives the candy a natural maple flavor. Use pure maple syrup rather than pancake syrup, which often contains other sweeteners and flavorings.
Since candy depends on the right sugar concentration, cook the mixture to 300°F using a candy thermometer for the best chance of getting a firm result.
5. Why did my candy turn out chewy instead of crunchy?
Chewy candy means the temperature did not get high enough. At 300°F, the sugar reaches hard crack stage, which gives you a crunchy bite. If you pull it off the heat early, the candy stays soft. Use a candy thermometer and wait for that exact number.
Also, do not stir after the sugar dissolves, because that can lower the temperature and affect the final texture. Give it time to reach the right stage.
Brach’s Maple Nut Goodies Recipe

Follow this Brach’s Maple Nut Goodies Recipe for a homemade copycat of the old candy bowl favorite, with clear steps, helpful tips, and storage advice.
Ingredients
- 1 cup pure maple syrup
- 1 cup granulated sugar
- 1 cup light corn syrup
- ½ cup unsalted butter
- 1 teaspoon baking soda
- 1 teaspoon pure vanilla extract
- 2 cups roasted peanuts, unsalted or lightly salted
Instructions
- Prepare the Pan and Ingredients - Line a baking sheet or shallow pan with parchment paper. Measure the maple syrup, granulated sugar, corn syrup, butter, baking soda, vanilla extract, and roasted peanuts. Cut the butter into small pieces and keep everything ready before cooking.
- Combine the Syrups and Sugar - Add the maple syrup, granulated sugar, and light corn syrup to a large, heavy saucepan. Heat over medium heat, stirring until the sugar dissolves. Once the mixture begins to boil, stop stirring and attach a candy thermometer to the pan.
- Cook the Syrup to 300°F - Allow the syrup to boil without stirring until it reaches 300°F (149°C), the hard-crack stage. Watch the thermometer closely as the temperature rises. Remove the saucepan from the heat as soon as the syrup reaches the correct temperature to prevent burning.
- Add the Butter, Baking Soda, and Vanilla - Carefully stir in the butter until it melts completely. Add the baking soda and vanilla extract, stirring gently as the mixture bubbles and foams. Use a large saucepan to prevent overflowing, and keep your face and hands away from the hot candy.
- Stir in the Peanuts - Add the roasted peanuts to the hot candy mixture. Stir quickly until all the peanuts are evenly coated with the maple syrup mixture. Work promptly because the candy begins to thicken as it cools.
- Spread the Candy - Pour the hot candy mixture onto the prepared baking sheet. Use a heat-safe spatula to spread it into an even layer. Avoid touching the candy directly, as the hot sugar mixture can cause serious burns.
- Cool and Break Into Pieces - Let the candy cool at room temperature for about 1 hour, or until completely firm. Break the set candy into bite-size pieces and transfer them to an airtight container. Store in a cool, dry place to help maintain its crunchy texture.
Nutrition Information:
Serving Size: per serving (1 of 24 pieces)Amount Per Serving: Calories: 200Total Fat: 9gSaturated Fat: 3gCholesterol: 10mgSodium: 55mgCarbohydrates: 30gFiber: .8gSugar: 22gProtein: 2.8g
This Brach’s Maple Nut Goodies Recipe offers a simple way to enjoy maple sweetness and roasted nut crunch at home.
I prefer this homemade version because the ingredients are easy to find and the maple flavor suits my taste. Try the recipe today, then share your experience and any changes you enjoyed.