
Ninja SLUSHi Max Soft Serve Ice Cream Recipe

Soft serve ice cream is one of the most popular treats at the local ice cream shop. I love the smooth swirl, creamy texture, and cold bite from the cone.
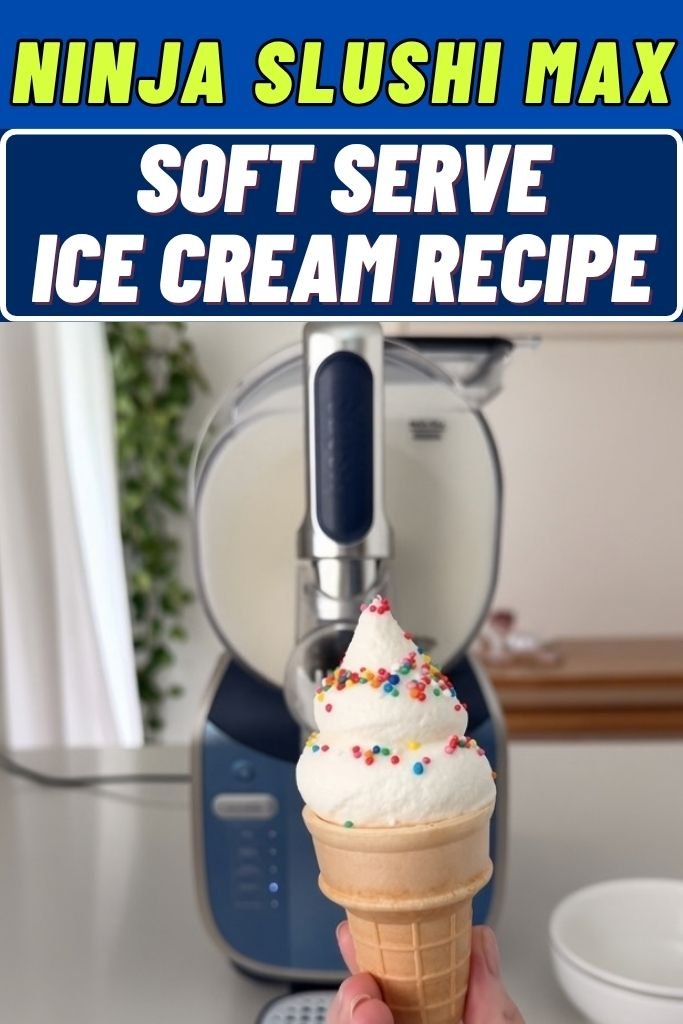
The new Ninja SLUSHi MAX is made for frozen drinks and milkshakes, not a soft serve program. Still, the Milkshake setting can turn a simple milk and cream mix into a thick frozen treat.
This Ninja SLUSHi Max Soft Serve Ice Cream Recipe uses milk, cream, sugar, and vanilla. The machine chills and churns the mix as it runs. The result is thick, smooth, and soft enough to spoon into a bowl or swirl into a cone.
Is the Ninja SLUSHi Max Good for Making Soft Serve
The Ninja SLUSHi MAX does not have a dedicated soft serve program, but its Milkshake setting works well for this recipe. The milk, heavy cream, and sugar create a rich base that freezes into a thick, smooth texture.
The right ingredient balance is important because too much sugar can keep the mixture too soft, while too little can make it icy. The exact machine settings are covered in the steps below.
Ingredients for Ninja SLUSHi Max Soft Serve Ice Cream Recipe
- Whole Milk (3 cups): Whole milk gives the base its smooth texture. It keeps the mix light enough to chill evenly in the machine. 2% milk also works, though the swirl turns a little less creamy. Fresh milk tastes best, so check the date.
- Heavy Cream (2 cups): Heavy cream adds the fat that gives soft serve its thick, silky feel. Half-and-half works for a lighter swirl, though the texture will be softer and melt faster.
- Pure Vanilla Extract (1 tablespoon): Pure vanilla gives the mix its classic shop flavor. It tastes warmer and deeper than imitation extract. For a bolder taste, scrape in the seeds from half a vanilla bean, or use 2 teaspoons of vanilla bean paste.
- Granulated Sugar (3/4 cup): Sugar sweetens the soft serve and helps keep the finished texture smooth and soft. It also dissolves into the milk and cream to give the mixture an even texture. Superfine sugar dissolves quickly, while powdered sugar can also be used at 1 cup.
Essential Kitchen Equipment
- Ninja SLUSHi Max machine
- Large mixing bowl
- Whisk (a balloon whisk works best)
- Liquid measuring cup
- Measuring spoons
- Rubber spatula (scrapes the bowl clean)
- Waffle cones or serving bowls
- Spoons for tasting
How to Make Ninja SLUSHi Soft Serve (Step-by-Step)
Making soft serve in the Ninja SLUSHi MAX is simple, even for a beginner. The recipe only needs a few basic steps, and the machine handles the freezing and mixing.
Just follow the steps below for a thick, smooth soft serve that is easy to make at home.
1. Add the Ingredients to a Large Bowl
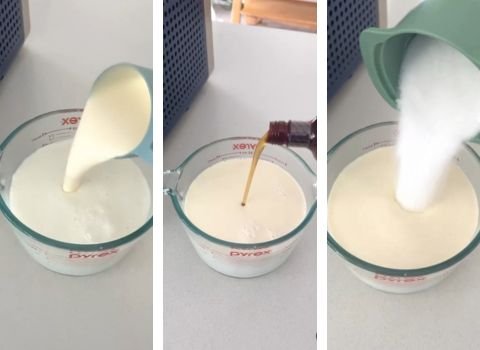
Set a large mixing bowl on the counter. Pour in 3 cups of milk and 2 cups of heavy cream. Add 1 tablespoon of vanilla extract and 3/4 cup of sugar. Use a bowl with plenty of room so the mix does not splash.
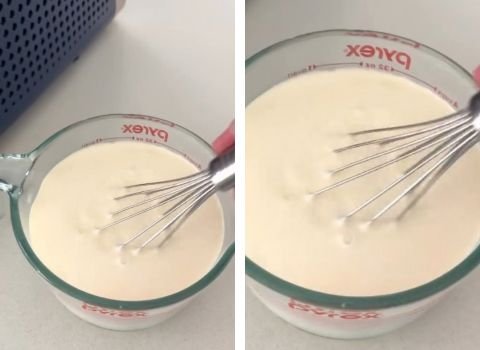
2. Whisk Until the Sugar Dissolves
Whisk the mixture well for about 1 to 2 minutes. Keep going until you cannot see or feel any sugar grains at the bottom.
The mix should look smooth and even, with no streaks of cream floating on top.
3. Pour the Mix Into the Machine
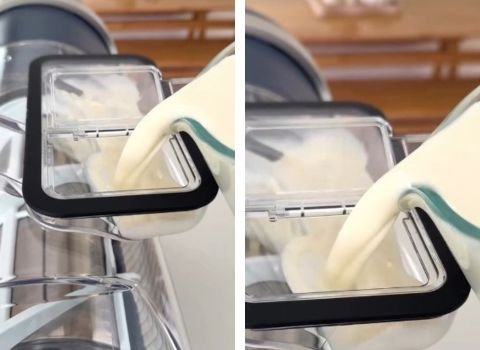
Pour the mixture into the top of the Ninja SLUSHi Max. Pour slowly and steadily so nothing spills.
Use a spatula to scrape out every last drop from the bowl, since the sugar and vanilla can settle there.
4. Select the Milkshake Setting
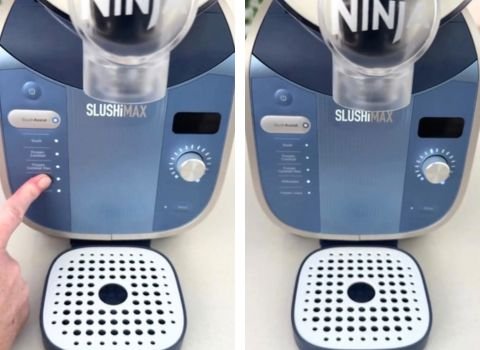
Turn on the machine and choose the Milkshake setting. This program is made for dairy and creamy drinks. It chills the mix gently, which is what soft serve needs to turn thick instead of icy.
Adjust the temperature setting so it sits one bar colder than the default. This small change is what turns a thick milkshake into soft serve. Do not go colder than one bar, because the mix can freeze too hard.
5. Let the Machine Run for 25 Minutes
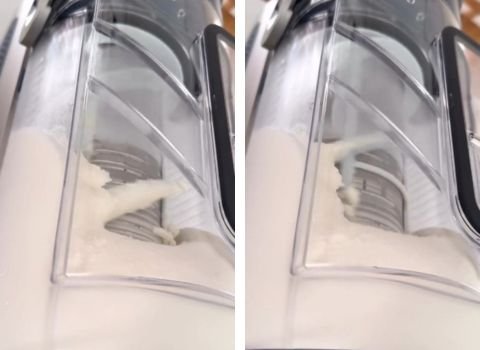
Let the machine run for about 25 minutes. Do not lift the lid or stop the program early. The mix is ready when it looks thick and holds its shape, just like the soft serve you get at an ice cream stand.
6. Dispense the Soft Serve Into a Cone
Hold a cone under the spout and pull the handle slowly. Turn the cone in a small circle as the soft serve flows out. Lift the cone as the swirl builds, and release the handle when the swirl looks tall.
Add toppings right away, while the swirl is cold and firm. Sprinkles, chocolate sauce, or crushed nuts all stick well. Toppings are optional, and the plain vanilla swirl tastes great on its own.

My Tips to Get Thick and Creamy Soft Serve
I have found that a few small details can change the final texture. These tips help me keep the soft serve thick, smooth, and creamy each time I use the Ninja SLUSHi MAX.
1. Add a Pinch of Salt: A small pinch of salt, about 1/8 teaspoon, sharpens the vanilla and makes the cream taste richer. Whisk it in with the sugar. You will not taste salt in the finished swirl, only a deeper, rounder flavor.
2. Give the Machine Space: Set the machine on a flat, sturdy counter with open room around it. Good airflow helps the cooling system work steadily. Keep it away from the stove, oven, and sunny windows, since heat makes the machine work harder.
3. Test Thickness With a Spoon: Near the 25-minute mark, dispense one spoonful into a small cup. Good soft serve clings to the spoon and falls in a slow ribbon. Watery drips mean the mix needs a few more minutes.
4. Coat the Cone Rim: Dip the cone rim in melted chocolate, add sprinkles, and let it set for a few minutes. The coating forms a thin barrier, so melting soft serve does not soak the cone and turn it soggy.
Different Flavors for Ninja SLUSHi Soft Serve
The vanilla base gives me a simple starting point for other flavors. I like changing the flavor after the basic recipe is familiar. The key is keeping the added ingredients smooth and liquid enough for the machine.
- Strawberry Soft Serve – For strawberry soft serve, whisk 2 cups whole milk, 1 cup heavy cream, ½ cup strawberry syrup, 1 teaspoon vanilla extract, and 2 tablespoons sugar. Pour the smooth mixture into the Ninja SLUSHi MAX. Select Milkshake and set the temperature one bar colder. Run until thick.
- Chocolate Soft Serve – For chocolate soft serve, whisk 2 cups whole milk, 1 cup heavy cream, ¼ cup chocolate syrup, 2 tablespoons cocoa powder, 1 teaspoon vanilla, and 2 tablespoons sugar. Mix until the cocoa and sugar dissolve. Pour into the machine. Select Milkshake and adjust the temperature one bar colder.
What to Serve With the Soft Serve Ice Cream Recipe
I like keeping the serving simple. When I make this soft serve, I usually set out a few small toppings and let everyone pick one. The vanilla base has a clean flavor, so I do not need a large topping spread.
Here are some of my favorite serving ideas:
- Waffle Cones – The crisp cone gives the soft ice cream a nice crunch.
- Chocolate Sauce – A light drizzle adds a deep chocolate taste.
- Crushed Cookies – Cookie crumbs add a crisp texture.
- Chopped Nuts – Peanuts or almonds add crunch.
- Rainbow Sprinkles – A small sprinkle adds color and texture.
- Maraschino Cherries – One cherry gives the classic sundae look.
Add Alcohol to Ninja SLUSHi MAX Soft Serve
Alcohol lowers the freezing point, so too much stops the mix from setting. The Max handles more than older models, with regular presets covering about 2.8% to 15% alcohol and a Max preset reaching 20%. Still, an alcoholic frozen drink turns into a slush, not creamy dairy soft serve. Keep the two apart, and serve only to adults.
Frequently Asked Questions About Ninja SLUSHi Max Soft Serve Ice Cream Recipe
1. Will this recipe work in the original Ninja SLUSHi?
Probably, since it also has a Milkshake preset. The original vessel holds 16 to 64 ounces, so this batch fits. The Max chills harder, though, so timing and thickness may differ. Watch the mix and adjust the temperature as needed.
2. What is the smallest amount of liquid I can use?
The Max works with 24 ounces up to 112 ounces. This recipe uses about 42 ounces, so it sits well above the low end. Going below the minimum can stop the machine from chilling the mix properly, so avoid cutting the batch too small.
3. Can I freeze it solid for scoopable ice cream?
Yes. Spoon the fresh soft serve into a loaf pan or tub, cover it tightly, and freeze for four to six hours. It firms into a scoopable treat, though it will be a bit icier than ice cream from a traditional churn.
4. Can I use a sugar-free sweetener?
Sugar helps the texture, so test with care. Ninja’s own guide lists erythritol as a sugar replacement for its drinks. Start with a small test batch, and expect a slightly firmer, icier swirl than the sugar version gives.
5. Why is my Ninja SLUSHi soft serve too thin?
A warm starting mix can take longer to freeze. Too much liquid can also change the final texture. I start with cold milk and cream and use the Milkshake setting. The temperature control can then be adjusted in small steps for the texture you want.
6. Can I make dairy-free soft serve?
Yes, but the results change. Try full-fat canned coconut milk mixed with oat milk in place of the milk and cream. Keep the same sugar and vanilla. The swirl turns a little softer and melts faster, so serve it right away.
Ninja SLUSHi Max Soft Serve Ice Cream Recipe

Make Ninja SLUSHi Max Soft Serve Ice Cream Recipe in 30 minutes with milk, cream, sugar, and vanilla for a thick, smooth homemade treat.
Ingredients
- 3 cups whole milk
- 2 cups heavy cream
- ¾ cup granulated sugar
- 1 tablespoon pure vanilla extract
Instructions
- Add 3 cups milk, 2 cups heavy cream, 1 tablespoon vanilla, and ¾ cup sugar to a large bowl. Whisk until the sugar dissolves and the mixture is smooth.
- Pour the mixture into the Ninja SLUSHi MAX. Use a spatula to scrape the bowl and get all of the mixture into the machine.
- Choose the Milkshake setting. Adjust the temperature one bar colder than the default to help the mixture reach a soft serve texture.
- Run the machine for about 25 minutes. The soft serve is ready when it looks thick and holds its shape.
- Place a cone under the spout and slowly pull the handle. Move the cone in a small circle as the soft serve comes out. Add sprinkles, chocolate sauce, or other toppings if desired.
Nutrition Information:
Serving Size: Per serving (1 of 8 servings)Amount Per Serving: Calories: 338Total Fat: 25gSaturated Fat: 15.5gCholesterol: 86mgSodium: 60mgCarbohydrates: 25gSugar: 25gProtein: 4g
This Ninja SLUSHi Max Soft Serve Ice Cream Recipe is a simple way to turn a cold milk and cream base into a thick frozen treat. Try the vanilla version, then add your favorite flavor.
Leave a comment and rating below and tell me how your soft serve turned out.